Sunday, November 21, 2021

Rashi Script in Google Docs!!!!

Rashi Script for Google Docs

Forgive the overuse of exclamation points, but GOOGLE DOCS HAS RASHI SCRIPT!!!


This is huge!

This was perhaps the last reason I continued to prepare worksheets in Word, and now Google has Rashi script. This is certainly a game-changer for teachers of Jewish texts.

How To Get It

The font (Noto Rashi Hebrew) can be loaded through the Google Docs Add-On Extensis Fonts.

See this previous post to learn how to add it to your Google Docs toolkit.

Hebrew Fonts in Extensis Add-On

Once you have added Extensis to your Add-Ons,  type or paste some text into Google Docs. I have grabbed the first Rashi on Chumash from Sefaria.


Highlight the text.

Go to Add-Ons in the Google Doc Menu bar and choose Extensis Fonts. Click Start.


Scroll down to Noto Rashi Hebrew. Click on it.


Your text should now be in Rashi script. 

The new font, Noto Rashi Hebrew, should now appear in your font list, ready to use whenever you need it.


Two caveats: The tzadi is oddly stylized. Stop kvetching. I am sure with enough exposure, we can all get used to it. [UPDATE: I discovered over shabbat that this is Steinsaltz's Rashi script.]


The Tzere Workaround


UPDATE: The Tzere has been fixed. It looks normal.

The second caveat is, as mentioned in the comments, that the tzere is really unrecognizable.
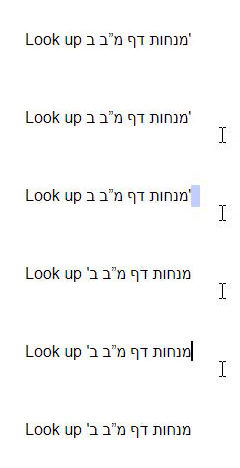
The workaround (admittedly a bit of a pain, but a worthwhile trade-off in my opinion if you need to use Google Docs with Rashi and nequdot) is as follows:

In Hebrew typing mode, place your cursor after the offending tzere, and hit backspace. This will delete the vowel. 
Go to the font list in the menu bar and change the font to one of the following (other fonts may work too; this is the result of my own experimenting):
Miriam Libre
Courier New
Tahoma.

Type the tzere (older PCs: Caps Lock, Shift+5; Chromebooks and some newer PCs, AltGr+M)
Repeat as necessary.

For more information on Hebrew and Google Docs, see my other posts:


Also search the tag "Hebrew" on this blog.

Wednesday, February 17, 2021

Printing when they don't want to let you

 Let's say that you have read-only access on JSTOR or find something on Google Books. Be thankful you have that. But you really need a copy of the article, and you can't download it (at least not for free).

You've already checked for the author on academia.edu but you struck out.

This isn't the simplest thing in the world, but it works.

Step 1: Go to the Google Chrome Store and install the Print Friendly and PDF extension.

Step 2: Go to the beginning of the article.

Step 3: Click on the Print Friendly extension. Choose Pdf, then Download your PDF.

Repeat for each needed page.

Chrome will give each download the same name, but if you save them all in the same folder, it will rename them sequentially e.g. page, page(1), page(2) etc.
Now, for each page this will give you a 3 to 4 page pdf with some extraneous pages before and after what you want, but somewhere around page 2 or 3 will be the page of the article you desire.

Yes, this requires repeated clicking. But it beats paying $34 for downloading one article.

Saturday, September 12, 2020

Installing and using the Google Translate extension

If you're dealing with online Hebrew texts and get stuck on a word, the Google Translate extension can help. It is far from perfect, and really can't deal with prefixes and suffixes well, but it can give you an idea of what the word means (at least its root if not its full form).

Go to the Chrome store and install the extension. (Click here for link.)

Once installed, go to your extensions


Then click the 3 dots next to Google Translate and click Options


And then choose Immediately display pop-up, and click Save.

When you double-click on a word now, Google Translate will try to detect the language (sometimes it thinks it's Yiddish) and translate. Verbs are almost never fully correct.


"Bring" is correct, but the proper translation is "that he should bring."

But here, Google Translate is more off-base.


In this context, הותרה means "loosened" or "untied" in the sense of being let off the leash to run wild.

And here it is waaaay off


The proper translation is "and take out" or "remove."

So beware. It can give you a sense of the word if you have no idea, but don't rely on it too much.


Thursday, August 27, 2020

Organize Google Classroom Visually

 Three suggestions for keeping Google Classroom manageable.

1. Keep the Announcements page free of assignments.

I heard an Ed Tech guru describe the Announcement page of Classroom as the cyberspace equivalent of the first minutes before class starts, where conversations take place; the Classwork page is where the class takes place.

Click of the Settings gear in the upper right corner of your Classroom page.

Scroll down to Classwork on the Stream and change the setting to Hide Notifications

.


If you'd like to use the Stream for comments, student questions, and teacher announcements, on the Stream setting, choose Students can post and comment.


2. Always Use Topics

Whenever you add anything to your Classwork, ALWAYS assign a topic. Come up with a system that is logical and consistent and use it, consistently. For some classes, I chunk topics by units (Chapter or Subject units), or by type of work (Classwork/Homework/Reviews).


The student can find grouped assignments by topic on the left side of the page.


Don't go overboard with Topics. Keep them manageable, logical, and consistent.

3. Add simple emoji icons to the title of your post for visual cues

I have a stable of about 15 emojis that I use consistently, especially for my weaker classes with learning issues, to help them visually organize what is posted. I keep them in a Bookmarks folder in Chrome labeled Emojis. Whenever I am posting anything, I keep an open tab for emojis.

My source is the Emojipedia.

Here is my collection:


These are all bookmarks in the Emojipedia. After I search through it and find one that I think is appropriate,  I bookmark it and change its name to whatever function I intend for it.

Here are some in use in last year's class:


If you've never edited the name of a bookmark, it's very simple.
Let's say I want to add a symbol for an assignment while I'm out sick.

I search Emojipedia and find this.


I decide on the Face emoji, click it, and am brought to its page. I click the little star in the Address Bar.


Before clicking Done, delete the name of the Emoji and rename it whatever you want to use it for.


And then click Done.

When you open the bookmark in a separate tab, click on the Copy button and the emoji will be copied to your clipboard.


 Then paste it in the title of your Classroom post.


Friday, July 17, 2020

Link to Text Fragment extension

Google has a great new extension.
Did you ever have to direct students to a specific place within a long web document?

Link to Text Fragment is simple to use.
Highlight some text (more than a couple of words) and right-click. The extension will appear as one of your choices.


Click and it will copy a link to your clipboard that will direct students to the specific spot on the site.

Sunday, July 12, 2020

Hebrew Vowels (Niqud) for Microsoft Windows and Word

This is very old news, but a few people asked me about it, so maybe it's worth a post.

To enter niqud in Word, for example:

1. Make sure you are in HEBREW language mode (Alt+Shift).
2. Engage Caps Lock
3. Place your cursor after the letter over/under/in which you want to inset niqud.
4. Hold down the Shift key and click the following:


If you need to use multiple nequdot on the same letter (Let's say, a Shin with a dagesh in it and a patach under it) the order is Dagesh, shin/Sin dot, vowel.

[The above chart is originally from the website http://www.qsm.co.il/Hebrew/wniqud.htm, which no longer exists.]

Thursday, June 25, 2020

Hebrew Vowels (Niqud) for Google Docs on Chromebooks

I have figured out how to insert vowels into Google Docs on a Chromebook. If this is documented fully anywhere, I haven't found it. Wikipedia is blank on this.

This is for Chromebooks and some newer PCs. It does not work on older PCs. (For Niqud in Windows, see this post.)

If you need a refresher on setting up Hebrew in Google Docs / on a Chromebook, see my post here.

The key (pun fully intended) to doing this is the Alt Graph key, often abbreviated AltGr. Don't panic. You do so have one. It's the Alt Key to the right of the spacebar.


When you are in Hebrew on a Chromebook (Ctrl + Spacebar to switch back and forth), position the cursor after the letter under/over which you wish to insert a vowel. Hold the AltGr (again, the Alt Key to the right of the spacebar) plus the following keys to insert niqqud.

(There's kind of a mnemonic to it - for many of the basic vowels, the key is the Hebrew letter that begins the name of the vowel. So [AltGR +] the ח'‏ key (J) for חירק; the צ'‏ (M) for צירה, the ד'‏ for דגש; the ש'‏ for שוא. The תנועות חטופות are immediately to the right of their counterparts. So פ'‏ (P) for פתח and the [ key for חטף פתח; the ק'‏ (E) for קמץ and the ר'‏ (R) for חטף קמץ; and the ס'‏ (X) for סגול and the ב'‏ (C) for חטף סגול.  The ו'‏‏ (U) is also the dot for the חולם. The backslash \ looks like a קבוץ, I guess.
Since the A is the ש'‏ key, the key to its upper right (W) puts the dot for the shin, and the  key to its upper left (Q) puts the dot for the sin.)


Key Combo
Vowel / Symbol
AltGr + E (ק)
קמץ
AltGr + R (רׂׂ)
חטף קמץ
AltGr + P (פ)
פתח
AltGr + [
חטף פתח
AltGr + X (ס)
סגול
AltGr + C (ב)
חטף סגול
AltGr + U (ו)
חולם dot
AltGr + J (ח)
חירק
AltGr + M (צ)
צירה
AltGr + S (ד)
דגש (also the dot for שורק)
AltGr + A (ש)
שוא
AltGr + \
קבוץ
AltGr + W
dot for שִׁין
AltGr + Q
dot for שִׂין
AltGr + 7
מתג
AltGr + -
מקף
AltGr + ‘/” 
גרשים a/k/a tzupchik -  רש״י
AltGr + `/~
ר׳ - גרש
AltGr + ;
Bottom of the line quote mark - „
AltGr + 
Quote mark proper direction - ”
AltGr + 4
New Israeli Shekel NIS
AltGr + ]
רפה mark - רֿ
Niqqud for Chromebooks  © Jeff Kuperman 2020


Downloadable copy can  be accessed here.

Tuesday, June 2, 2020

For Students: How to upload work to Classroom

Since there are still students who do not know how to do this (How is this possible?!), here is a tutorial.

Click on the assignment in your Due list


Under Your work, click on Add or Create


Attach your Google Doc and submit.


Wednesday, May 6, 2020

PDFs vs the Color Yellow (and Light Blue)

I don't understand why, but whenever I convert a Google Slide, Power Point, Word file with graphics, Mind Map etc. to pdf, anything with a yellow or light blue background comes out with no color. If the text is colored, then that too disappears.

This is the original Mind Map on mindmup.com


But this is what happened when I downloaded it as a pdf. Notice the light blue squares are now without color.


The solution is to download the file as a jpeg or png and then upload the graphic into Adobe Acrobat (best professional purchase of my career) or an online graphic-to-pdf converter like smallpdf, and convert it to a pdf. This way, the original colors are preserved.


The same thing happened when I tried downloading a Google Slide as a pdf, and it was crucial that the colors be preserved. I tried downloading it as a PowerPoint, but regardless of what I did (I even tried changing the shades slightly, using gradients, etc.) the pdf was missing the yellow on the yellow slide. I had to download the problematic slide as a jpeg and convert it to a pdf and delete the problematic page from the pdf presentation and insert the jpeg to pdf slide in its place.

Tuesday, December 10, 2019

YouTube "Videos Not Aproved"

You may have noticed lately that if you access YouTube on your school account, you will now see a blue bar with a message that reads "Video not approved for mjbha.org" and a white "Approve" button.


What's going on?


A teacher tried to leave an educational video for students to watch in her absence, but the students could not access it.

It turns out that the newly reconfigured blocking software is keeping an awful lot of useful videos out of our students' hands.

IT has now set it up so that if you wish to share a video on, say, Google Classroom, you can approve the video for school use. When you share the link with the students now, they will be able to open the video in school.

How to share videos


If you need a refresher on how to share videos, I'll run through the easiest method.

Once you've clicked "Approved," click on the curved arrow that says Share under the video. Copy the URL (https://youtu.be/etc.) that appears in the box beneath.


Go into Classroom and set up a post.  Click the Add Link symbol  (orange arrow in the picture) and paste that into the Add Link pop-up box in Classroom and click Add Link (yellow arrow) and then hit Post.


Wednesday, July 31, 2019

Uploading files from computer to Google Drive

A quick tutorial on how to upload files from a computer to your Google Drive.

Open Chrome and go to Google Drive (drive.google.com). Make sure you are signed in to your Google account. (Reminder - your school Google Drives are virtually (ha!) bottomless, so you'll probably never run out of room.)

Click on the "New" button in the upper left.


The click on either "File Upload" (if you just wish to upload a file, or a few select files) or "Folder Upload" (if you want to upload an entire folder, or several folders).


Then a Windows Explorer window (the thing that looks like a manila file folder) will open. Navigate to the folder(s) you want, and then click "Open."


QUICK REMINDER: You can choose multiple files by holding the Ctrl key as you click each one with your mouse. If you want to choose a group of files, you can hold the Shift key, click the first file, and while still holding the Shift key, click the last file in the group; all the files in between will now be highlighted / chosen.

Tuesday, March 12, 2019

Coolsymbol.com - fun stuff (and a very useful tool for Hebrew)

Check out coolsymbol.com. It is full of fun symbols to dress up your docs, neat text effects and all other sorts of goodies.

Just look at all the different star symbols to use in place of a boring asterisk:


Just click on anything and it loads into your clipboard.

It has so much more than the Insert Special Character in Google Docs. 

But if you scroll all the way down to the bottom of the home page, there's something very useful for Google Doc workers in Hebrew or Arabic or any other Right to Left language: Other Special Non-Printing Characters. [UPDATE: This can be done manually on Chromebooks. See below.]


The one we want is the very last one - Right-To-Left Mark.

If you've ever put a punctuation mark after a Hebrew word in Google docs (like a single quote, a/k/a גרש, a/k/a tchuptchik) you know the frustration of having it go to the other end of the sentence.
Click the Click to Copy box and after you type the גרש, hit ctrl+v and the mark will magically jump back to where it belongs.

Image from Gyazo

(This is one of the many reasons I still write my multilingual English/Hebrew documents in Word rather than Google Docs; Word keeps going right to left until you switch back to English.)

UPDATE: Manual method for Chromebooks only.
After you type the גרש and it goes to the wrong side, switch to English and hit Ctrl+Shift+U. You'll see an underlined u. Type 200F and hit enter. This will insert a RLM (Right-to-Left Mark)
I didn't say it was easy, just manual.


Hebrew Formatting from Word to Docs

If you have ever tried to save a multilingual Word Doc mixing right-to-left and left-to-right text as a Google Doc, you know that the formatting can often get messed up in the transition.

(Full confession: I still write most of my tests in Word. It still handles Hebrew better than Docs.)

However, if you paste the Word doc into a blank Google Doc, the proper formatting is preserved.

The one thing that gets changed is - if you use automatic numbering in Word, the numbers will get pasted into Docs as regular text, not automatic updating numbers. Not a deal-breaker for me. The upside outweighs the downside.

Thursday, March 7, 2019

Search within folders in Google Drive

Sometimes something new is right in front of you and you don't pick up on the difference. Once when I was a kid, my father shaved off his mustache and I didn't notice it.

Apparently, for the last year, there's been a new feature in Google Drive; one, in fact, that I always felt was a major missing feature that rendered Google Drive less than user-friendly. You can now (now being either January 2018, or this morning, when I finally noticed it) search within folders on Google Drive.

This is important. Although I keep my Drive fairly neat, with nested folders within folders, often I can't remember in which folder a crucial file is hiding.

Right click on the folder in Google Drive online. One of your options is "search within _____ "


Saturday, October 20, 2018

Line Numbers for Google Docs now works for Right-to-Left docs as well

One of the things that kept me using Microsoft Word is the line number feature. When teaching texts to students, it helps to be able to direct them to the right line easily.

The useful Google Docs extension Line Numbers for Google Docs adds line numbers along the left side of the page. But what if your document is a Right-to-left document, like Hebrew or Arabic?

Thanks to extension designer Pablo Gamito, the extension now easily handles such documents. (I e-mailed him on Friday and he updated the extension the very next day!)

EDIT: Two caveats - the numbers do not appear in a shared document (although there's nothing stopping the recipient from installing and utilizing the extension herself) and they are not retained if you use Download as pdf, although if you use Print to pdf, they are preserved. This has dampened my enthusiasm somewhat.

Install the extension from the Chrome Store. Once in a Google Doc, click the extension and choose how many lines (every one, every five, etc.) you want numbered.


Click on "Show More Options"


There are many ways to customize the numbering, as you can see. Choose the last item to have the numbers appear on the right.

If the numbers don't appear immediately, click Reload Google Docs Page. And voila!


If this is useful, be sure to give the extension a positive rating on the Chrome Store. And if your corporate / school account is like ours and won't let you log in to the Chrome Store even if you can download extensions, log in under your personal account and give the designer the thanks he deserves.


Wednesday, September 5, 2018

Posting documents on Google Classroom that don't need to be submitted

[UPDATE: Google Classroom has fixed this problem with the addition of the Post Material option, so this post is moot.][Does Google ever run their updates by actual teachers?! ]

I have a particular problem with the new Google Classroom - you can't assign a topic to an announcement.

So if I want student to be able to go back and locate a worksheet or a text document to study for a quiz or test, I have to post it as an assignment, so the posts are organized by topic.

But if I am sending out a graphic organizer on Google Docs, I want the students to have their own copy, and I don't want them to have to submit the document back to me - it's there for them to use, and to train them to take notes.

I tried to do it as I did last year, but it didn't work.

Unfortunately, as teachers we cannot see what the student gets when we post something. Luckily I have a fake student account, and recently I went back and forth through 4 different attempts until I got what I needed.

To wit:
1. Send out as an Assignment so that it can be grouped with the other worksheets and easily retrieved later.
2. Force each student to make a copy of the original document so that each student is working on his/her own copy
3. Not require them to return the document to me, but just to click the MARK AS DONE button.

The Process

Step One: Create your document on Google Docs.


Step Two: Change the Sharing settings from Anyone with the link can edit to Force everyone to make a copy.

You can do that manually (see directions here) or you can use the Sir Links-a-Lot Chrome extension (see post here).
Make sure the new link is saved to your clipboard.

Step Three: Open Google Classroom and Create an Assignment.


Name the assignment, change the Points Value to "Ungraded," do not assign a Due Date, and assign a Topic.


Do NOT use the Add Link feature! Paste the force-copy link on the Instructions line, and click ASSIGN.

This is what the student sees:


Student clicks on the link and it opens another window and forces them to make a copy. Student can then just click MARK AS DONE and clear the "assignment."