Monday, February 22, 2016

Type Transliterated Hebrew in Chrome

Great for students who have yet to learn how to touch-type in Hebrew. (See the bottom of the post for information on learning to type in Hebrew)

THIS ONLY WORKS IN CHROME ON A PC, MAC OR CHROMEBOOK.
It does not work on Chrome on an iPad or Android device; those are not true Chrome browsers.

STEP 1: Search for Google Input Tools in the Chrome Store

Add caption


STEP 2: Click + Add to Chrome . Click Add Extension when prompted.


STEP 3: You will receive the following confirmation:


STEP 4: The first time you click on the Extension icon, you will see Extension Options. Click that.


STEP 5: Scroll down to ע - Hebrew - עברית; click on the choice with the large ע. (The keyboard icon will give you a pop-up Hebrew keyboard that can be operated with a mouse on-screen; the Pencil icon will allow you to use handwriting.) Click the arrow between the boxes to select.


STEP 6: Now when you click the Google Input Tools icon in the active extensions section of Chrome (the upper-right corner) you will see your choices. Click on the עברית  ע to select; click again to de-select.)


STEP 7: Now the fun starts. Type a Hebrew word in transliteration. Choose it when it pops up in the window.


STEP 8: If you need more words type them one by one until what you're looking for appears.


STEP 9: This also works for inserting the occasional word in a Google Doc. However, for more intense Hebrew typing, the pop-up keyboard is preferable.

Caveat: No matter how hard I try, I can't figure out how to make it recognize shehecheyanu (or any of its variants) as שהחיינו.

Ultimately though, you're going to have to learn how to touch-type in Hebrew.

(To learn how to touch-type in Hebrew, play on this website. If the site is confusing, switch language to English first to get the lay of the land, and then switch back to Hebrew.)

Monday, January 4, 2016

Hide SMART Notebook's Toolbar

It can be pretty annoying if you're trying to show a full-screen video and the little tab for the SMART Board is on the side of the screen.

Here's how to get rid of it.


If you're not sure what the dock is, it's the little box that pops open when you move your mouse to the little Up Arrow in the lower right-hand corner of your Task Bar.


Click on the Blue box with the white donut - then select Hide Floating Tools.


One Stop Shopping for all your pdf Needs

I just found this wonderful site, smallpdf , which combines 14 (!) different functions to work with pdf files.


Find it all at

Friday, September 11, 2015

Share to Classroom

A fantastic new Chrome extension that allows you to post a webpage link to your Google Classroom directly from your browser without having to copy the link and open Google Classroom.

[NOTE: This only works on the Chrome browser on your computers or on Chromebooks. It does not work with the iPad or Android tablet version of Chrome.]

Go to the Chrome Webstore and search for "Share to Classroom" and click Add to Chrome.


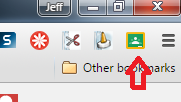
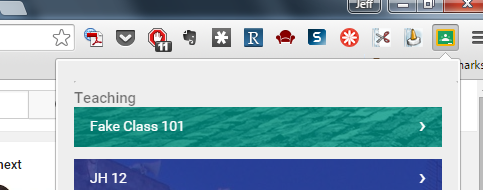
Once installed, a little Classroom icon appears in the upper right of your Chrome browser.


Click on it and it will display your classes.


Choose your class. Then - 

Decide if it will be an Announcement (no action is required from the students on Google Classroom) or an Assignment (which at the very least the students need to click DONE when they have completed the task, or submit something depending on the nature of the assignment).

What's Push?
For "Push to Students" to work, all of your students must install the extension. I plan to include a link on Google Classroom itself (as an Announcement) to get it done as soon as they log in to my GC.
Since everyone in class will have a Chromebook and will be logged into Chrome with their school address, you could "push" the web page to the students and it would open automatically in a new tab within Chrome for them - no need to paste (or worse, dictate) a URL. And presto! everyone is on the same (web)page. Literally.

Thursday, September 10, 2015

How to use the Assignment feature on Google Classroom for Student Uploads

I was asked about using the Assignment feature for Google Classroom (GC) for items that are not Google Docs, Slides etc.

The teacher wanted to have the students take phone pictures of their written work in their workbooks and submit the pics through GC, because she wanted to make use of the Assignment feature that keeps track of who has submitted and who has not (yet).

This method can be used to upload ANY material that is created or found by the students - artwork, Word documents, web links, videos, etc.

While I was at it, I decided this would be a good opportunity to show you what the students see when they do an assignment on GC.

START OFF by going to GC, clicking the +, and choosing Create Assignment


Your assignment is for the students to upload a camera pic of their work


When the STUDENT gets the assignment - this is what s/he sees in her/his GC:


Once they have completed their work and photographed it, they click ADD to upload their picture.


The students can also include a PRIVATE message to the teacher that is NOT seen by the rest of the class. When they are done, they click TURN IN.


It gives them one last chance ...


Once they submit the work, it shows up as done. If they're having second thoughts, they can UNSUBMIT it before the teacher opens it.


Back on the TEACHER'S GC, you can see how many have submitted the assignment.


 When you click on X DONE, you can see WHO has submitted the assignment. You can then click on the file and view it.
(For advanced users - if you use the Chrome extension Pic Monkey, you can write comments on the picture.)


Once you've seen the submission, you can grade it and return it.


You can also respond privately to any posted questions.


Wednesday, August 26, 2015

Why I dropped Dropbox for iPad

Don't get me wrong - I love Dropbox and use it for all my classes and my repository of thousands of journal articles downloaded over the years.

But the iPad app stinks. The display window of the document names is impossibly narrow. If I have 5 articles by the same author, I can't  see past his/her name to the title of the article itself.

That's why I switched to Documents by Readdle.

It's a free app. It works in conjunction with all your online depositories like Dropbox, Google Drive, Box, etc. It displays all file types clearly, allows previews, and has many more features that I have still yet to explore.

Dropbox screenshot vs. Readdle


Get Readdle HERE

Wednesday, July 8, 2015

Share Quizlets Directly to Google Classroom


You can now share Quizlets directly to your Google Classroom!

When you've completed the Quizlet, click Share and choose Google Classroom.

It's that easy.