Tuesday, May 29, 2018

CheckMark Extension adds years to your life

[UPDATE: The new Comment Bank feature in Classroom makes this extension obsolete.]

Well, maybe not years, but I probably just saved over an hour of typing the same comments on 40 tests. It adds up.

CheckMark is an extension that lets you add customized comments (or canned comments if you teach English Composition on the grade level it's aimed at) on Google Docs at the click of a button. They can be as long as you need, and can include multiple languages, symbols or anything else you can put in a Google Docs comment (i.e. no special formatting).

Go the Chrome Store and get CheckMark


When you install it, it will appear in your Chrome Menu in the upper-right hand corner.


If the first time you click it it does not say Enabled, enable the extension.

At first it will present you with a list of canned comments for English Comp. If they work for you, enjoy. If they do not, you can delete every single one by clicking the red X.

Here's where it gets useful. Let's say you start grading and soon realize that several students have made the same mistake. Do you want to type "I think you confused Jefferson Davis and Thomas Jefferson" on 40 Google Docs? I didn't think so.

So let's go:

Click on the Extension, and then on the Preview Edit Pencil.

Click on the green + sign. Give your comment a 3-4 letter abbreviation so that you can readily identify it, and type (or paste) the comment you're going to be re-using. Click Apply.


I, by the way, ended up with about 11 "stock" comments for this particular test.

Back in Google Docs, when you come to one of those answers...

 Highlight a word in the answer, and the CheckMark bar will appear translucently above the line.

If you hover your cursor over the little blue box it will get darker and he comment will appear in a hover text box, just to be sure you're choosing the correct response.
 Click the blue box and CheckMark will automatically enter the pre-selected comment into Google Docs comments and close the comment box.


Downsides: If you're moving among different assignments, and you don't need CheckMark for one class, (mine were VERY test-specific) the only way to silence it is to [click the 3 square dots at the top-right of your Chrome browser] go into More tools, Extensions, and temporarily disable the extension.
Also, I have had limited success with it fully syncing between computer, and have gone home and not found all of my added comments available.
But I suspect these will get ironed out in future iterations.

I still think it is a fantastic addition to my Google Docs tool case.


Some nice Hebrew fonts for Google Docs

It's always nice to play with typography to make our Google Docs stand out.

The Extensis add-on to Google Docs can give you access to hundreds of new fonts.

(In any Google Doc, go to Add-ons, click "Get Add-ons", and search for Extensis. Select it, choose your account and click Allow.)

So how many of those fancy fonts work for Hebrew? About 15 - 20. (and no Rashi yet)

Check them out here. The page will show you what they look like.
(Here is a partial screenshot)


Or just search in Extensis for the following fonts:
Alef, Amatic SC, Arimo, Assistant, Bellefair, Cousine, David Libre, Frank Ruhl Libre, Heebo, Miriam Libre, Rubik, Secular One, Suez One, Tinos, Varela Round

[Cousine has weird spacing issues with the letter ו"ו, and Secular One and Suez One are bold poster-like fonts.]

To the above list I will also mention Cardo and Tahoma, which can be found in Extensis as well.

If you know of any more, please let me know in the comments.


Friday, March 16, 2018

Get the Google Apps you need directly from your Chrome Menu

As a teacher in a G Suites school, I use Google Apps (Docs, Forms, Drawings, etc.) all the time. And I need fast access to them if I'm going to get anything done.

The following two Chrome extensions, used in conjunction, make my life so much easier. Let me make your life easier, too.

Part One:


The first extension is App Launcher Customizer for Google™ .

Install it, and you can customize the App Launcher that appears on any Google App page in the upper right-hand corner. (It looks like a 3x3 grid of blocks.)


Click on the extension in your Chrome Menu and you'll see this screen.


Just drag all the apps you use into the "My services" window, and all the one that you DON'T want out of the "My services" window back into the "Available" window.

There are an AWFUL LOT of Available apps! Use the Search feature to find the ones you're looking for.

I personally like to keep my App Launcher window clean, so I ruthlessly limit it to 12 icons. Any time a new one comes in, an old one goes out, but you can cram it as full of apps as you wish.


Part Two:

The second extension is App Launcher in popup

After installing this, it will put the app launcher icon directly on your Chrome Menu.


The biggest advantage is now I don't have to be on a Google-related page to access the App Launcher, and now I have access to the apps I need on a daily basis, and only those apps, from anywhere in Chrome.


Monday, November 6, 2017

Supercharge your Google Apps with Add-ons and Chrome with Extensions


ICYMI - From today's Mimi Charnoff Professional Development Day, my list of my go-to Add-ons for Google Apps (Docs, Forms, Slides) and my favorites extensions for Chrome.

REMINDER: Extensions only work in Chrome on a Chromebook, a PC or a Mac. They do NOT work on Chrome on a phone or tablet (iPad, etc.) as they are not true Chrome browsers.


Google Doc Add-ons
Change Case
For those typing mistakes - ALL CAPS all gone
Extensis Fonts
Find precisely the right font
Kaizena
Add voice comments to a shared doc thru Google Classroom
Highlight Tool
Share labeled highlighter categories
Sefaria
Add Jewish texts directly to docs
In an open Google Doc, go to Add-ons.

Google Form Add-ons
123RF Stock Photos
Free photos to insert into Forms
All Questions Required?
For Quizzes - Click when finished
CheckItOut
For keeping track of inventory
Form Publisher
Convert to Doc, Slide, Sheet
Form Limiter
Limit time or number of responses
PaperScorer
Create bubble sheet from form - scan w/ phone to score


Google Slides Add-Ons - NEW!
AdobeStock


Free photos to insert into Slides
ShutterStock
Unsplash Photos
Pear Deck
Create formative assessments and interactive slides
Slides Toolbox
One-click for repeated tasks


Supercharge Chrome with Extensions
Edit Microsoft Office files with converting to Docs, etc.
Save articles to read later
Blocks ads online
Does what it says
Post or push site to Google Classroom
Click and e-mail webpage
Save directly to Keep
Declutters distracting pages
Declutter and open multi-page articles
Create a temp, real-word URL shortcut
New tabs open blank
Double-click on a word for its definition
Turn all your tabs into 1 link page
Translate, transliterate into other languages
On-screen tutorials within Google Apps
If you need to insert foreign accents
Opens Rediker in parallel window from Classroom
Opens up to 20 docs in separate tabs

Thursday, September 14, 2017

Screen Reading Showdown - PageZipper, Mercury Reader, Readability Redux

There's a lot of good stuff out there on the web. But reading on a computer monitor can be very uncomfortable.

First of all, the text is often shoved over into a skinny column while annoying ads hog most of the real estate on one or both sides.


Or those Wikitext articles that cover the entire screen in print.


Or that dreaded notice on the bottom "Click here for next page."


There are Chrome extensions to handle each of these problems individually, but there's one that handles them both.

PageZipper 


The first extension is PageZipper, available here on the Chrome Store, and it does just what its name claims. Install and click on the extension, and it will take a multi-page article and zip it together into one long continuous screen.


Here is screenshot showing the transition from the bottom of the first page to the top of the second.


But if there are ads at the bottom of each page, you still have to wade through all of them to get to the next page. And it does nothing to remove the distracting ads or increase the print size.

Mercury Reader

To deal with the crowded or cluttered page, there is Mercury Reader, available here on the Chrome Store. It is heir to such dearly departed extensions as Read Now and Clearly.

Mercury Reader cleans up the page, keeps the illustrations, eliminates the advertisements and extraneous information, and allows you to read in large, uncluttered print on your screen.


If you click on the Settings gear in the top right corner (not pictured) you can choose between serif and sans serif and adjust the size of the font.


Unfortunately, Mercury Reader will not display all the pages of a multi-page article.

Readability Redux

However, Readability Redux does all these things. It's customizable,  cleans up the page and displays all the pages of a multi-page article on one screen.

Caveat - the following extension can no longer be found by searching the Chrome Store, but this link will bring you to it directly. It hasn't been updated in 6 years, but it still works and it works better than any other extension at solving both these problems at once.

However, it does take a moment to set up to your liking. Right-click the extension and go to Options.


Fine tune your settings (you can see what they will look like as you choose) for Style, Print Size, and Margin Width.


Not only does Readability Redux remove all the ads and give you a nice readable, uncluttered page, it also automatically sews together all the pages from a multi-page article.

Here's a screen shot of the transition from the first to second page:


So despite its age and limited availability, Readability Redux is still my go-to extension for reading anything on my monitor.

Sunday, September 3, 2017

Saving in Google Drive - Folders

By default, when you create a Google Doc, it just saves it to your Google Drive. Multiply that by all your files (and everything shared with you), and you're not going to be able to find anything pretty soon.

I'll detail two ways to create folders and move files into them - the on-the-fly method for those of us who forget to set up the folder before we make the file, and the from-scratch method for those people who plan ahead. (I do not include myself in that group, but I know they exist.)

Method One - From Google Docs


Once you've created the Google Doc, it will be automatically saved in Google Drive.

To create a new folder and move the file there, click on the Folder icon (Move to...) next to the file name in the upper left corner. It will bring up your Google Drive. Click on the Folder icon with the Plus sign.


Name the Folder (1) and click on the Check sign.


This creates the new folder. Finally, click on Move here and your file will be relocated into the newly-created folder.


Of course, you can maneuver to a previous folder and create a sub-folder (a folder within a folder) ad infinitum.

Method Two - From Google Drive


1. For those Plan Ahead people, go to Google Drive and click NEW (1) and then  click on the Folder icon with the Plus sign (2).


2. Name (1) and then create (2) the new folder.


3. After you create your new Google Doc,  to move it to the destined folder, click on the Folder icon (Move to...) next to the file name in the upper left corner. It will bring up your Google Drive. 


 4. Scroll down to your newly-created folder, click on it and then hit Move.

5. And you will see a briefly displayed message confirming that your file has been moved.


Of course, once you have already created a folder, you can just use steps 4 & 5 over and over to move files to their proper place.


Thursday, March 30, 2017

Force a copy in Google Docs link

When I share worksheets with my students in Google Classroom, I don't want to post it as an Assignment, because I don't want the students submitting it back to me. I want them to hold on to it to study from.

If I post it as an announcement - if they can edit it, it will become one shared document with everyone working on it. Sometimes I want that, like when they are reviewing as a group.

But sometimes I want each student to do their own work. If I share as view only, then they can view the document, but they can't edit (i.e. write on) it. That's okay for in-class reading, but obviously inappropriate for worksheets.

If I ask them to make a copy of the document, there will always (and I means always) be a few who do not and then can't figure out why they can't write on it.

The trick is to force them to make a copy.

When you have completed the Google Doc, click SHARE, then click Get shareable link.


Click Copy Link.


Now, in Google Classroom, create an announcement, and on the description line, paste the link (Ctrl+V) where it says Share with your class.

The link will be a long string of gibberish; focus on the end.

https://docs.google.com/.../edit?usp=sharing

Position your cursor and delete the word edit and replace it with copy.

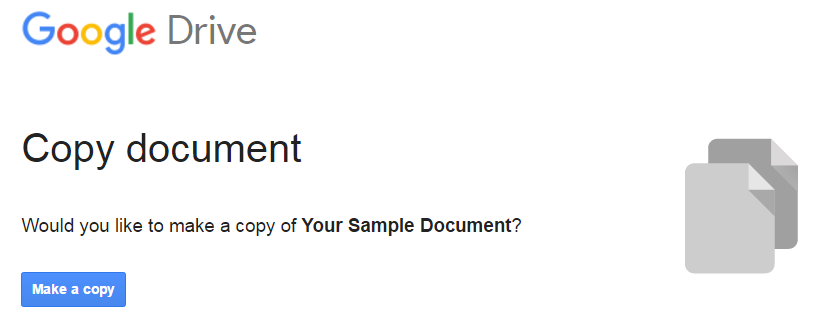
When they click on that link, they will be confronted with this:


Their only choice is to to click Make a copy.